

Table of Contents
Imagine this: it’s the first day of second grade. School picture day. Hell yeah. You wear your Heelys and your Spiderman T-shirt. You’re gonna make your friends wish they were as cool as you. Your mom does your hair, and you’re ready to roll.
As you walk into the school gym where the photographers are all set up, you notice that there’s a bunch of cameras, umbrellas, and flashes going off all at once. But what are they actually doing? How does everything work? Well, I’ll break it down for ya.
THE GEAR:
Camera: Canon R6 mirrorless camera
Lens:85mm f/2 lens
Tripod: Peak Design
Flashes: Yongnuo speedlites x3
Key light: Aperture Light Dome SE
Rim Light: Aperture Light Box 30120
Backdrop: Neewer
Reflector: Neewer
Reflector stand: Neewer
C-stand: Neewer
Light stands: Neewer x2
THE SETTINGS
Camera Settings
Using a mirrorless camera, you have to make sure that your image preview is turned off. This will allow the camera to focus properly in the low-light environment (that is, before we add the flash).
Here are my camera settings for the below headshots: ISO 100, f/4.0, 1/200s.
I’m using the lowest ISO for the cleanest image, f/4 for a smooth rolloff of focus while keeping the face nice and sharp, and the shutter is just below the sync speed so I don’t get any black bars in my image.
Flash settings
The key light is set to 1/16 power, the rim light is at 1/32, and the backlight is at 1/16 power. Play around with these until they properly expose the subject.
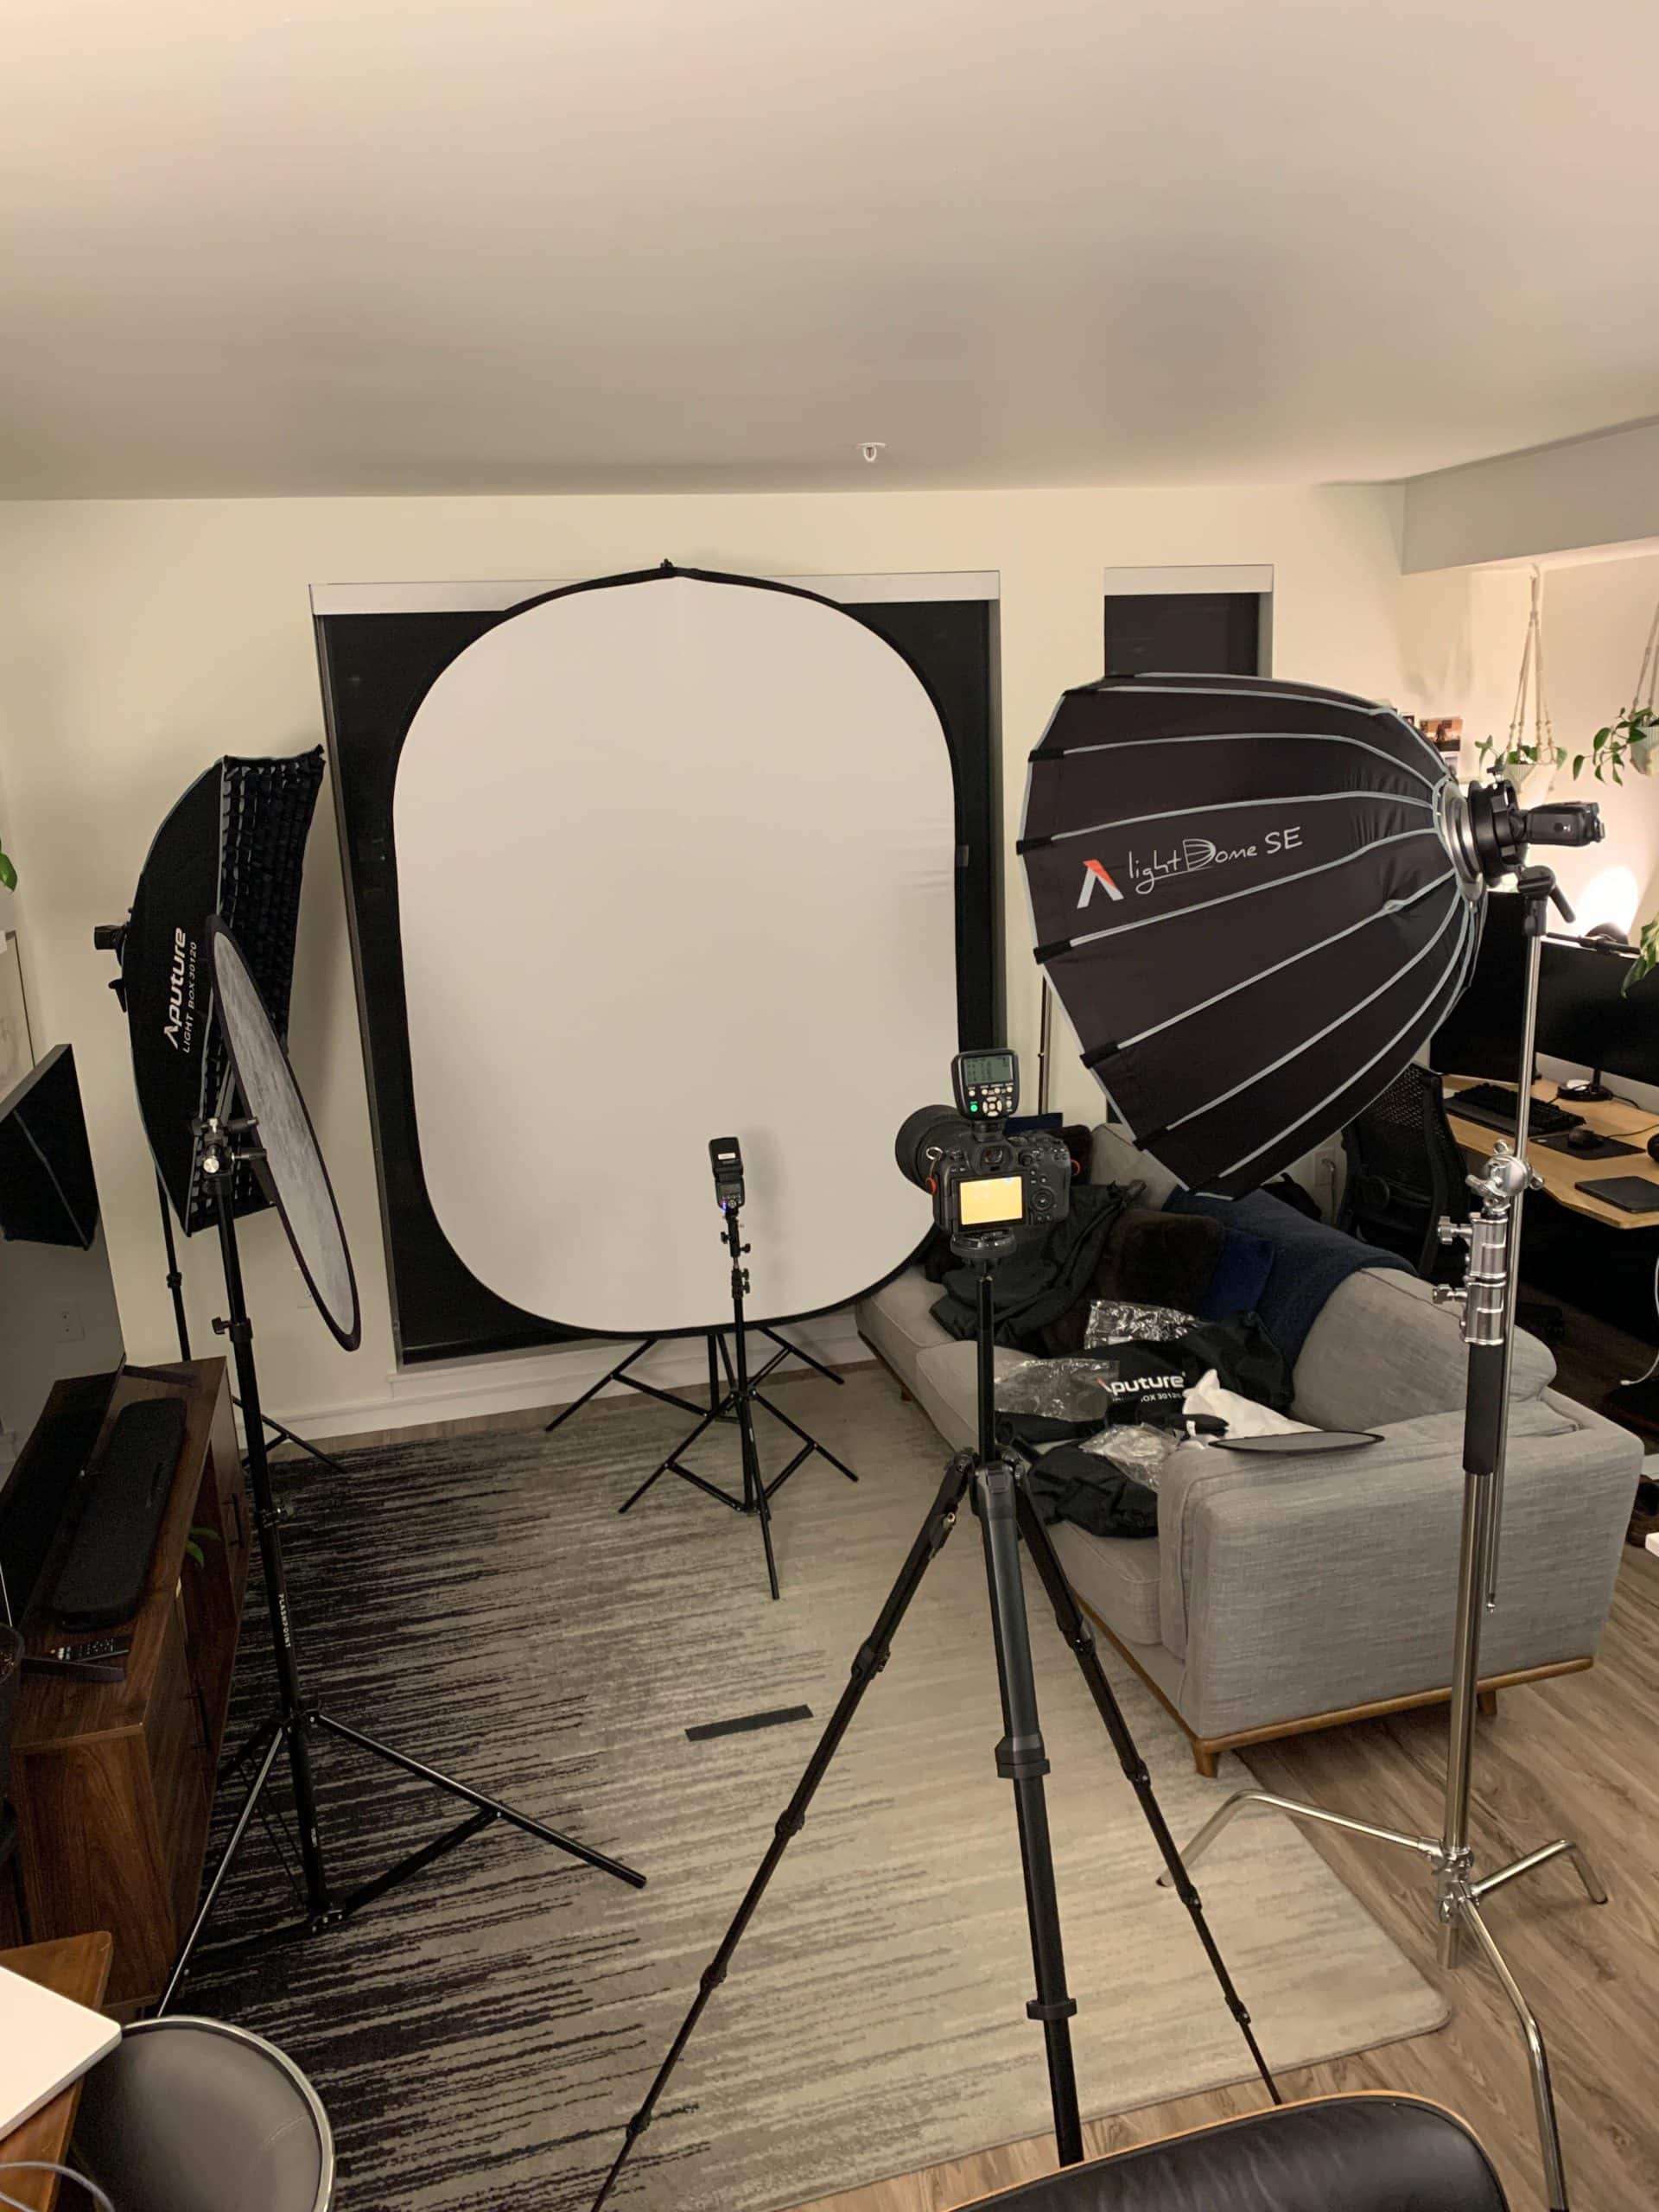
THE SET UP
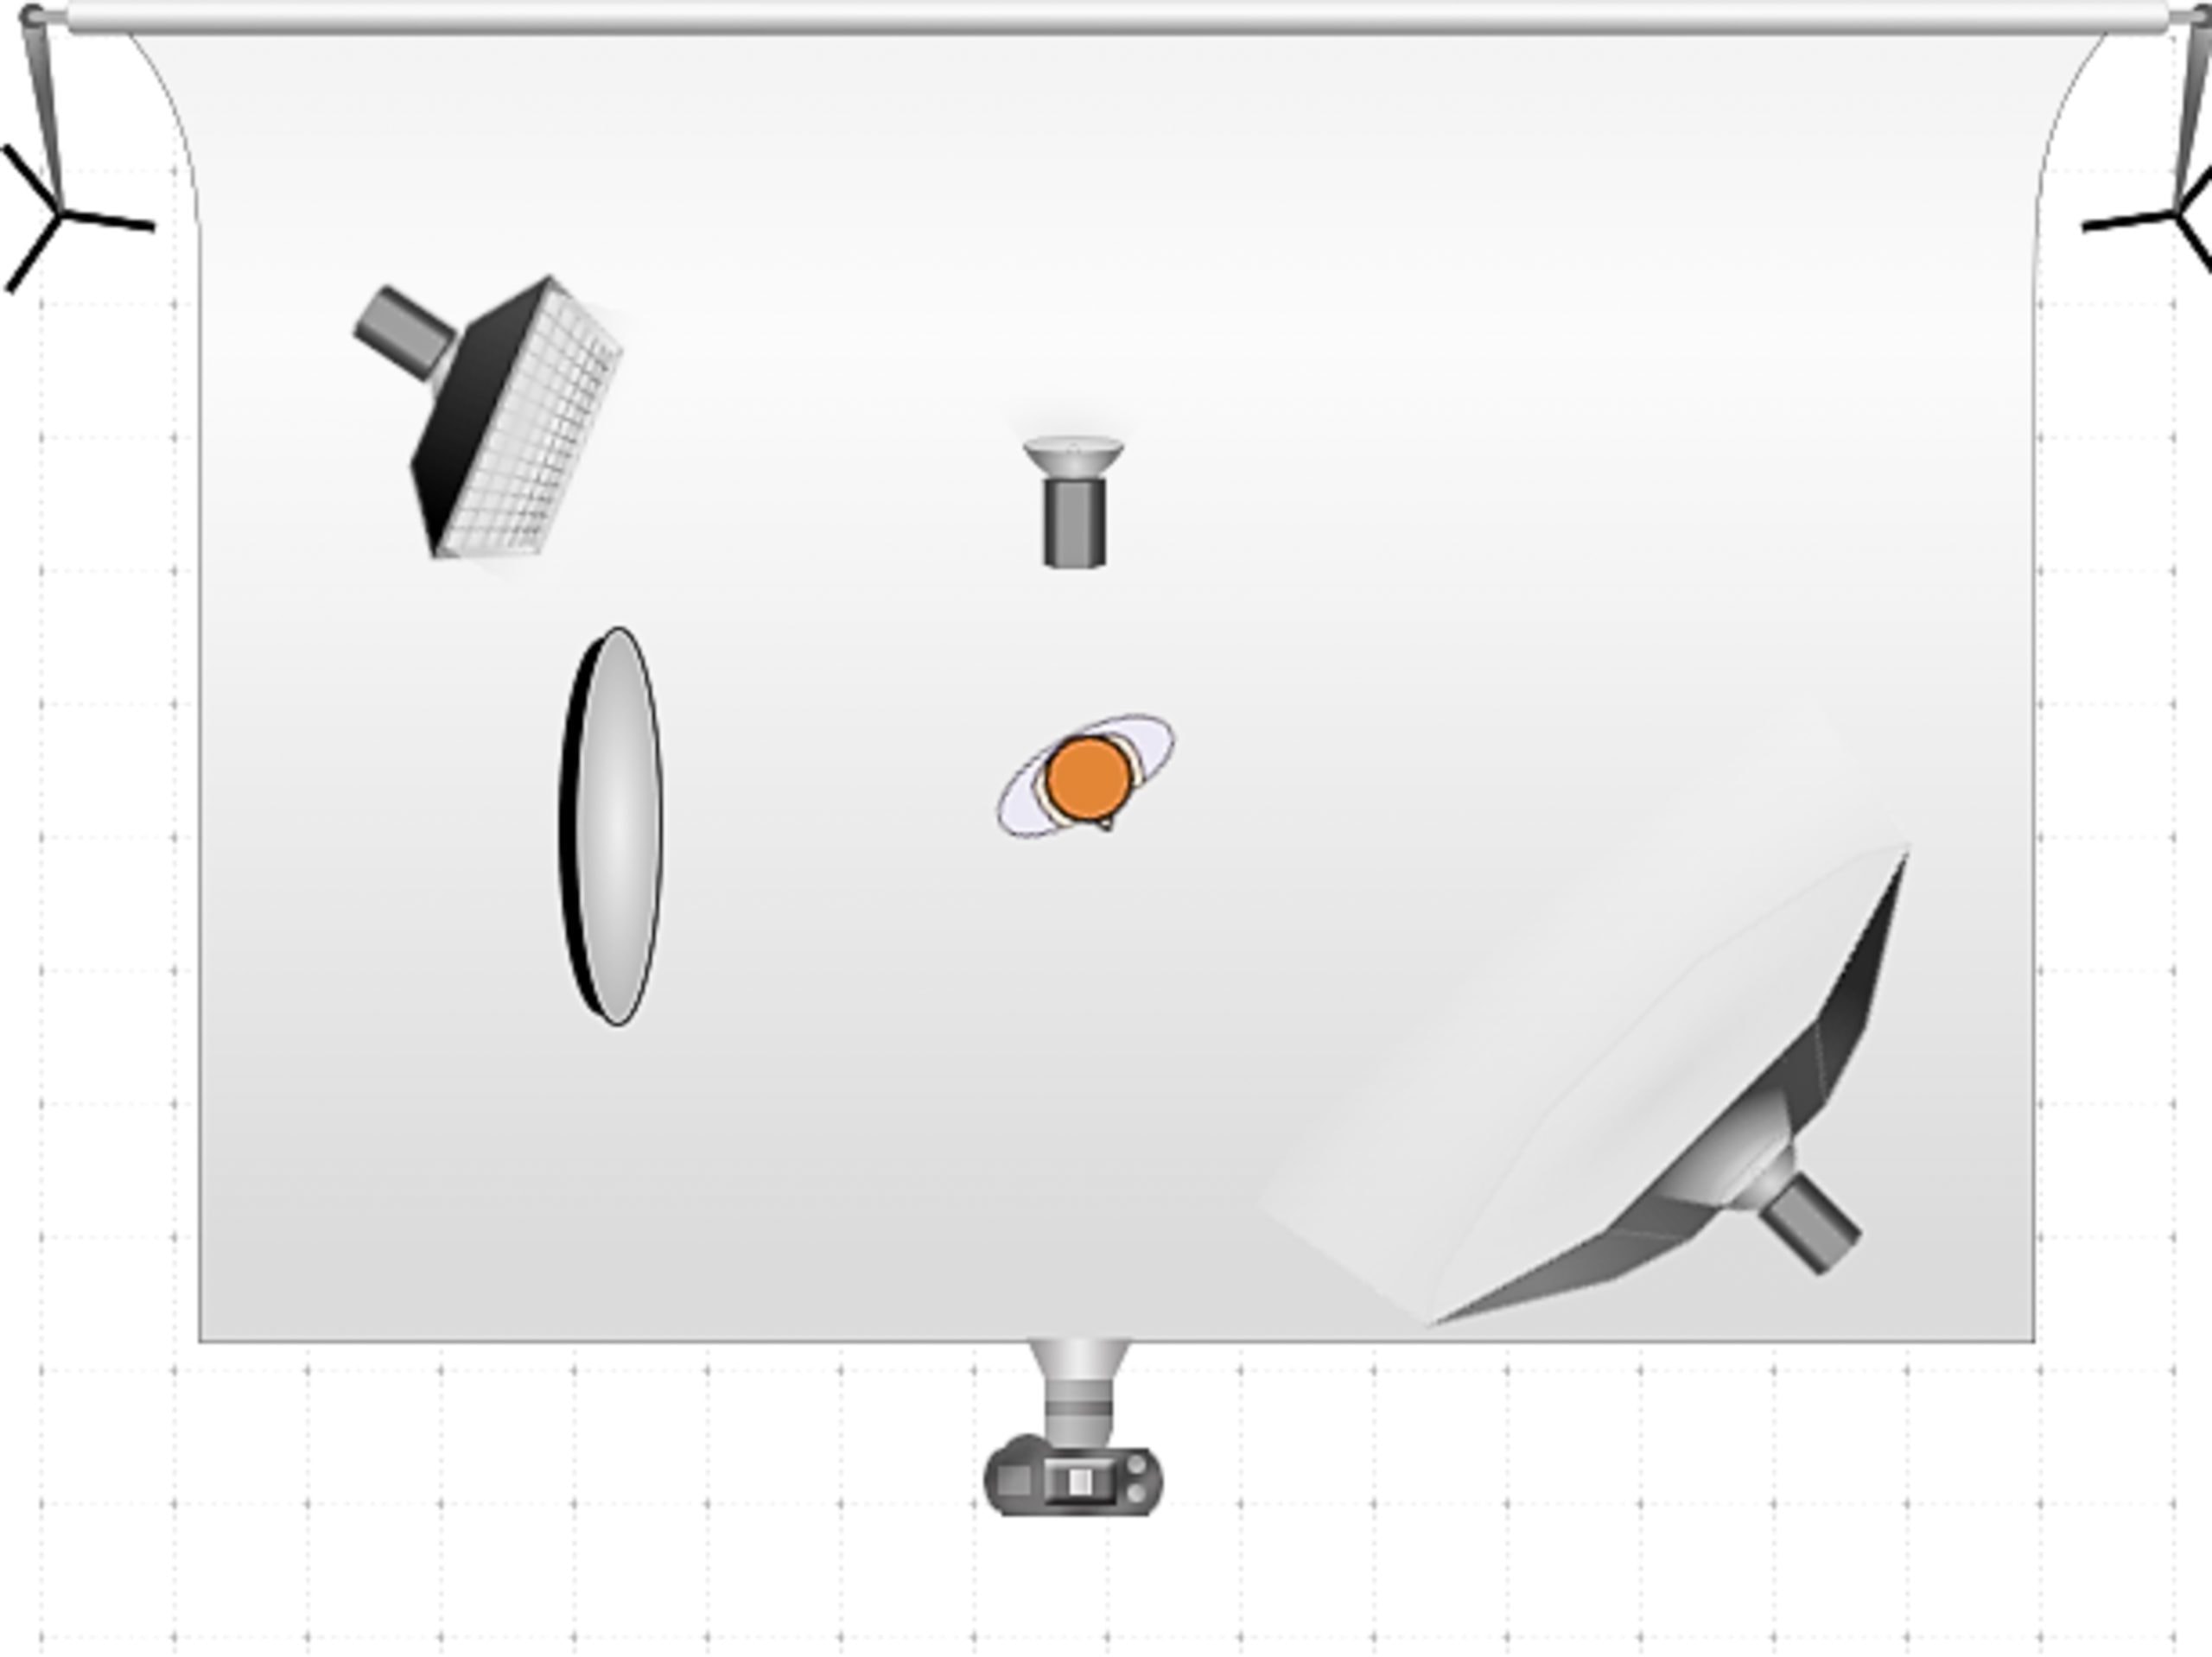
And here’s what it looks like in the middle of my living room:
WHY DO PHOTOGRAPHERS USE FLASH?
Flash is used to overpower the ambient lighting in the room. Since my living room has a combination of orange lights and white lights, the flashes will provide the best clean white light on my subject’s face.
WHAT DO THE BIG MODIFIERS DO?
The big modifier, the Aperture Light Dome SE is called the Key Light. This provides most of the light on my subject’s face. This kind of modifier is called a soft box. The larger the softbox, and the closer it is to the subjects face, the softer and smoother the light will appear (i.e. it won’t be harsh).
When the key light fires, it will also bounce some of its light onto the reflector, filling in the subject’s shadows on their face. Here’s an image of what both of those lights look like when fired:

Not bad — he’s pretty handsome. But, I notice a few things here. First, the subject does fade a little bit into the background here. We need to separate him out a bit. Second, the white background looks grey when the subjects skin tone is balanced properly. Let’s fix that.
First, we’re going to use the fill light — the Aperture Light Dome 30120 with a grid diffusion on it. The grid focuses the light so I can get the rim lighting that I’m looking for. This separates the subject from the background and makes a big difference.

Notice the additional light on the right side of the image and the difference in the hair. This is from the rim light.
Finally, we’re going to add the pop into the image by firing a flash directly at the backdrop. This slightly brightens the exposure on the subject’s face, and makes a HUGE difference in the image.

Now, the white background looks white, and the headshot looks pro!


")


_1")
")


comments +